NurseWang on Nostr: Well, it's been a busy week. Earlier this week, my wife had her chemo port removed, ...
Well, it's been a busy week. Earlier this week, my wife had her chemo port removed, so I had the day off. I don't often have the day off, so I took advantage and started one of these Jack Spirko Bioreactor Compost piles.
It's made with mostly wood chips, and a small amount of rabbit manure (as a ratio). I tried to harvest the old wood chips from where I had the chickens for the last year, but while I was gone at work, my wife had a tree company who was working at my neighbors drop the chips on the only available space... Where I meant to harvest the old chips from the chicken run... That's ok though I was still able to get the outskirts, and now I have fresh chips for all sorts of fun this year.
I started out with a 4x16 cattle panel. Jack recommends 3x16 goat fence, but that was $99 vs $37 for the cattle panel.
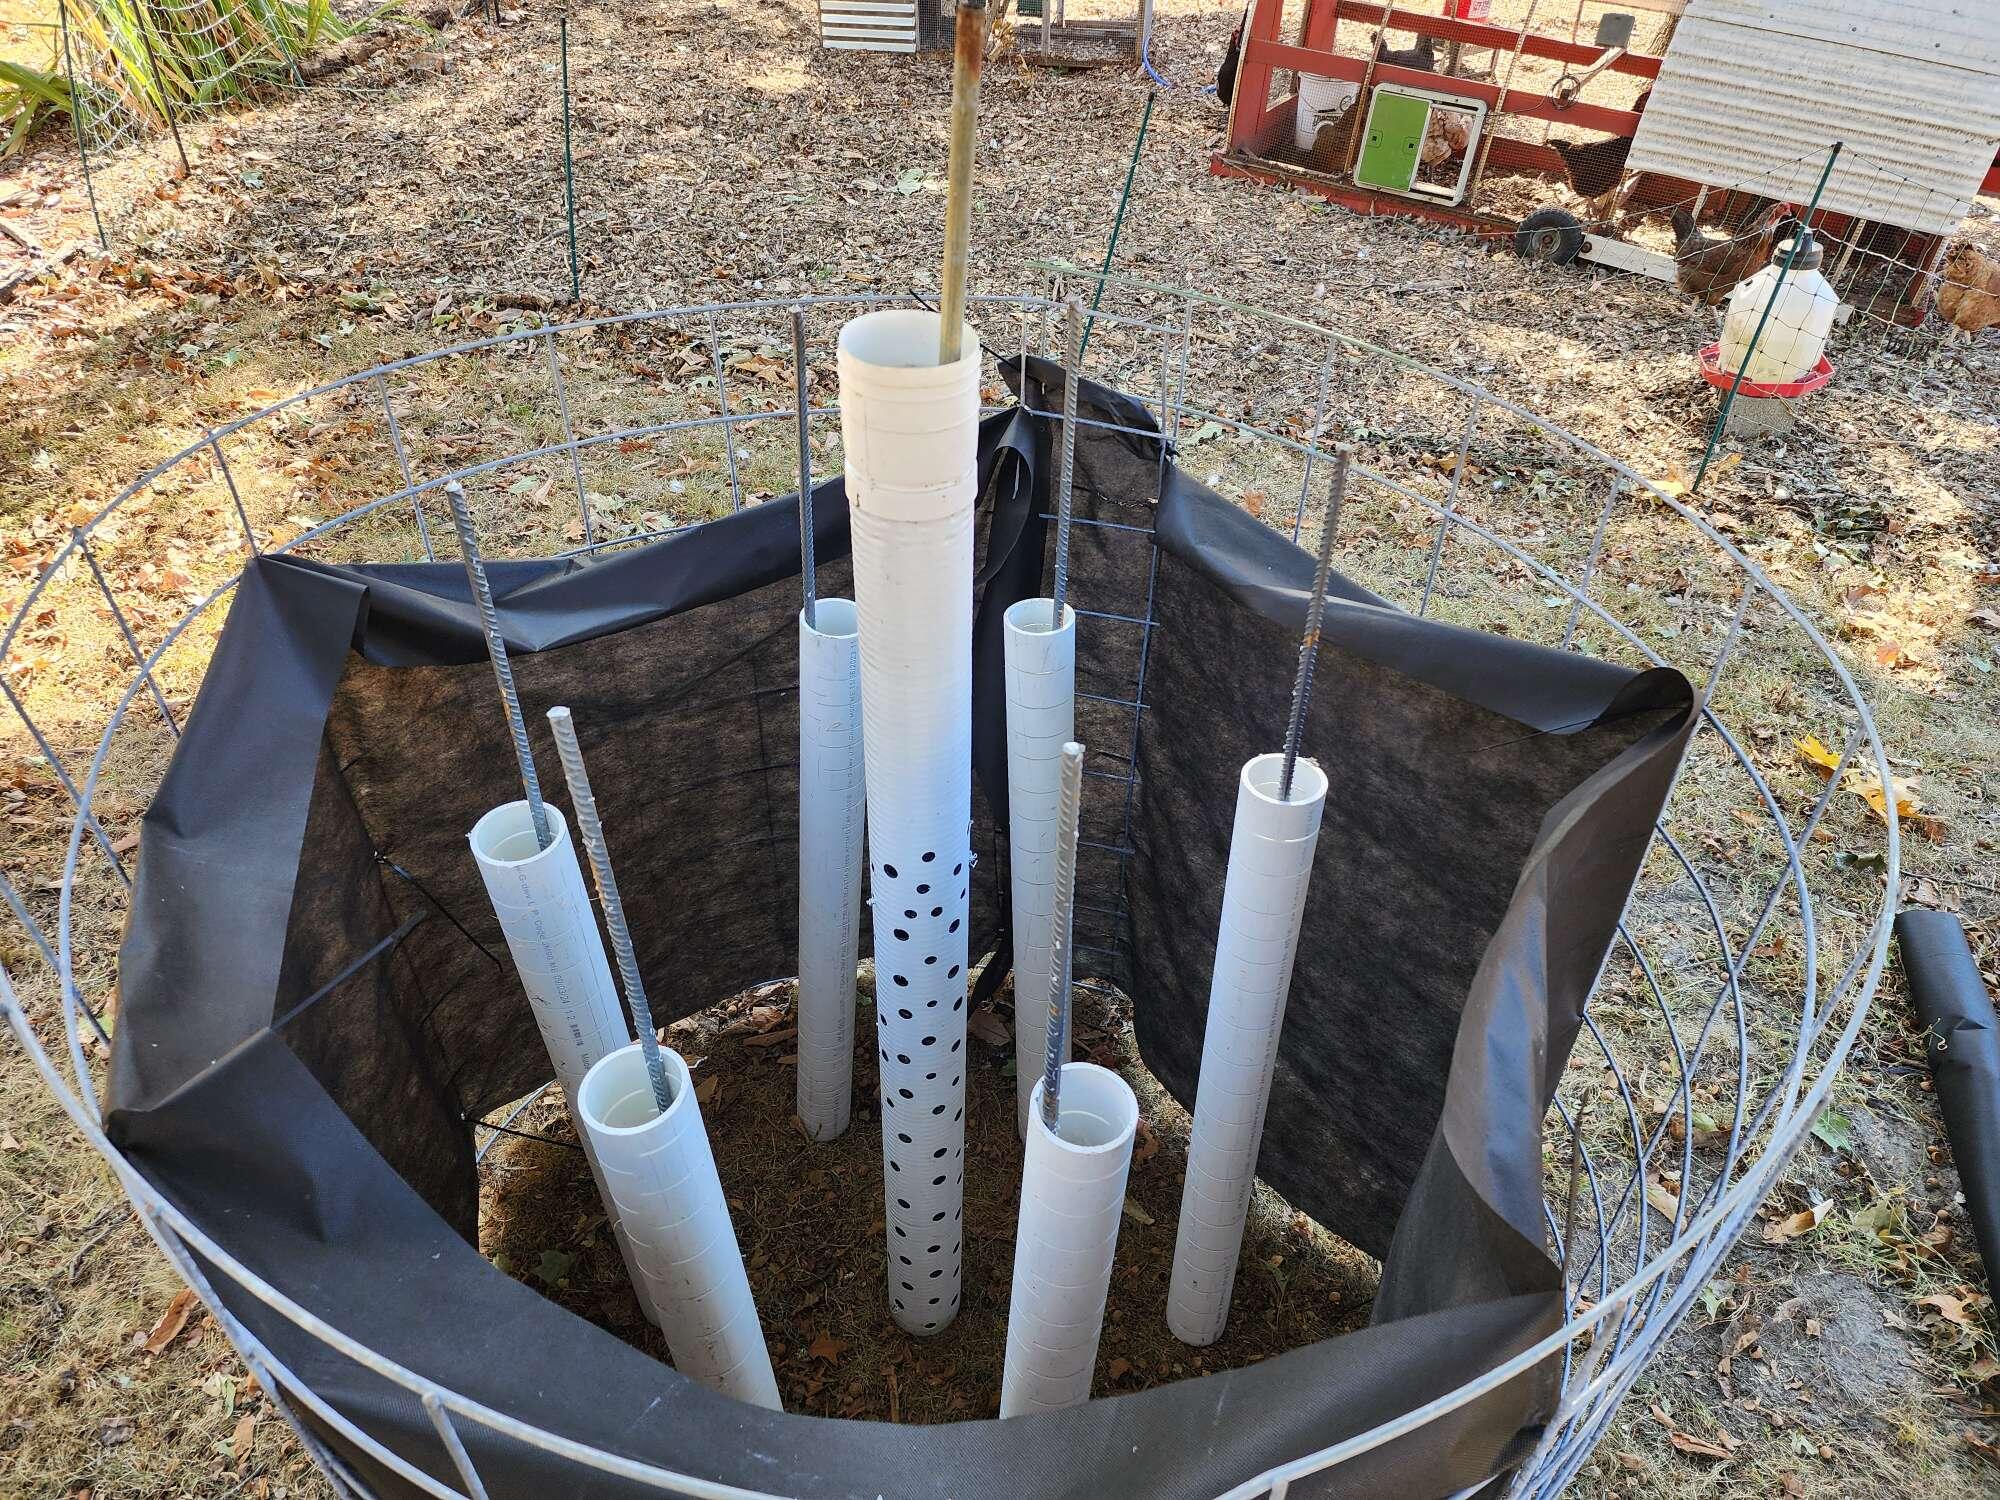
I then lined the inside with weed blocker and used stainless steel S-clips to hold the cattle panels in a cylinder shape. I overlapped the last section, so close to 15' 4" in circumference.
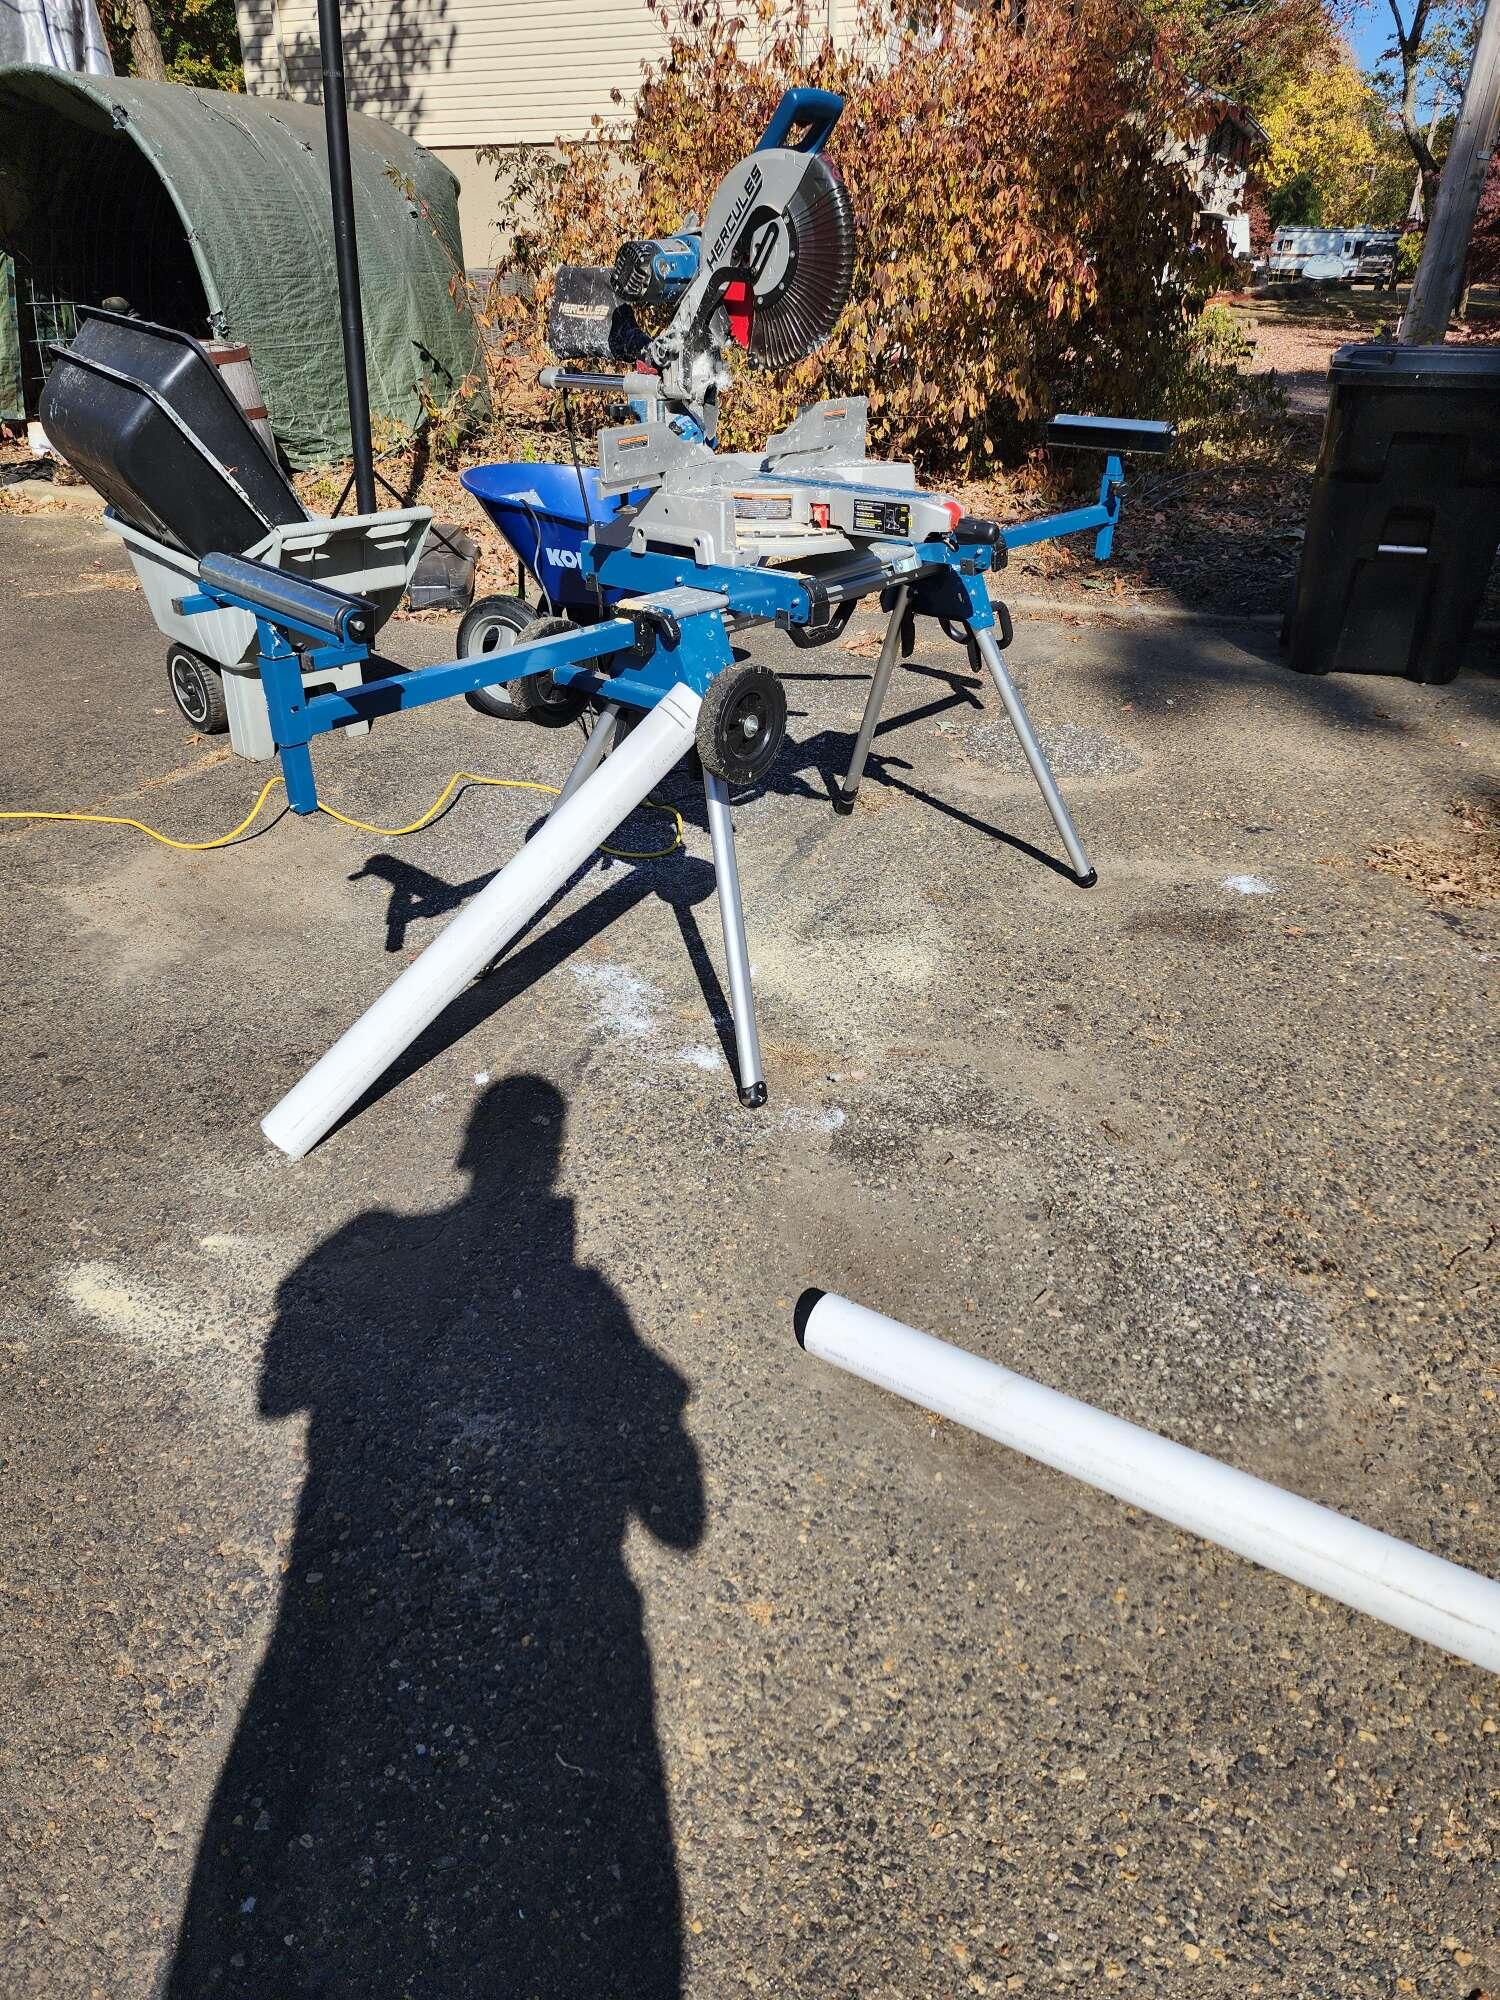
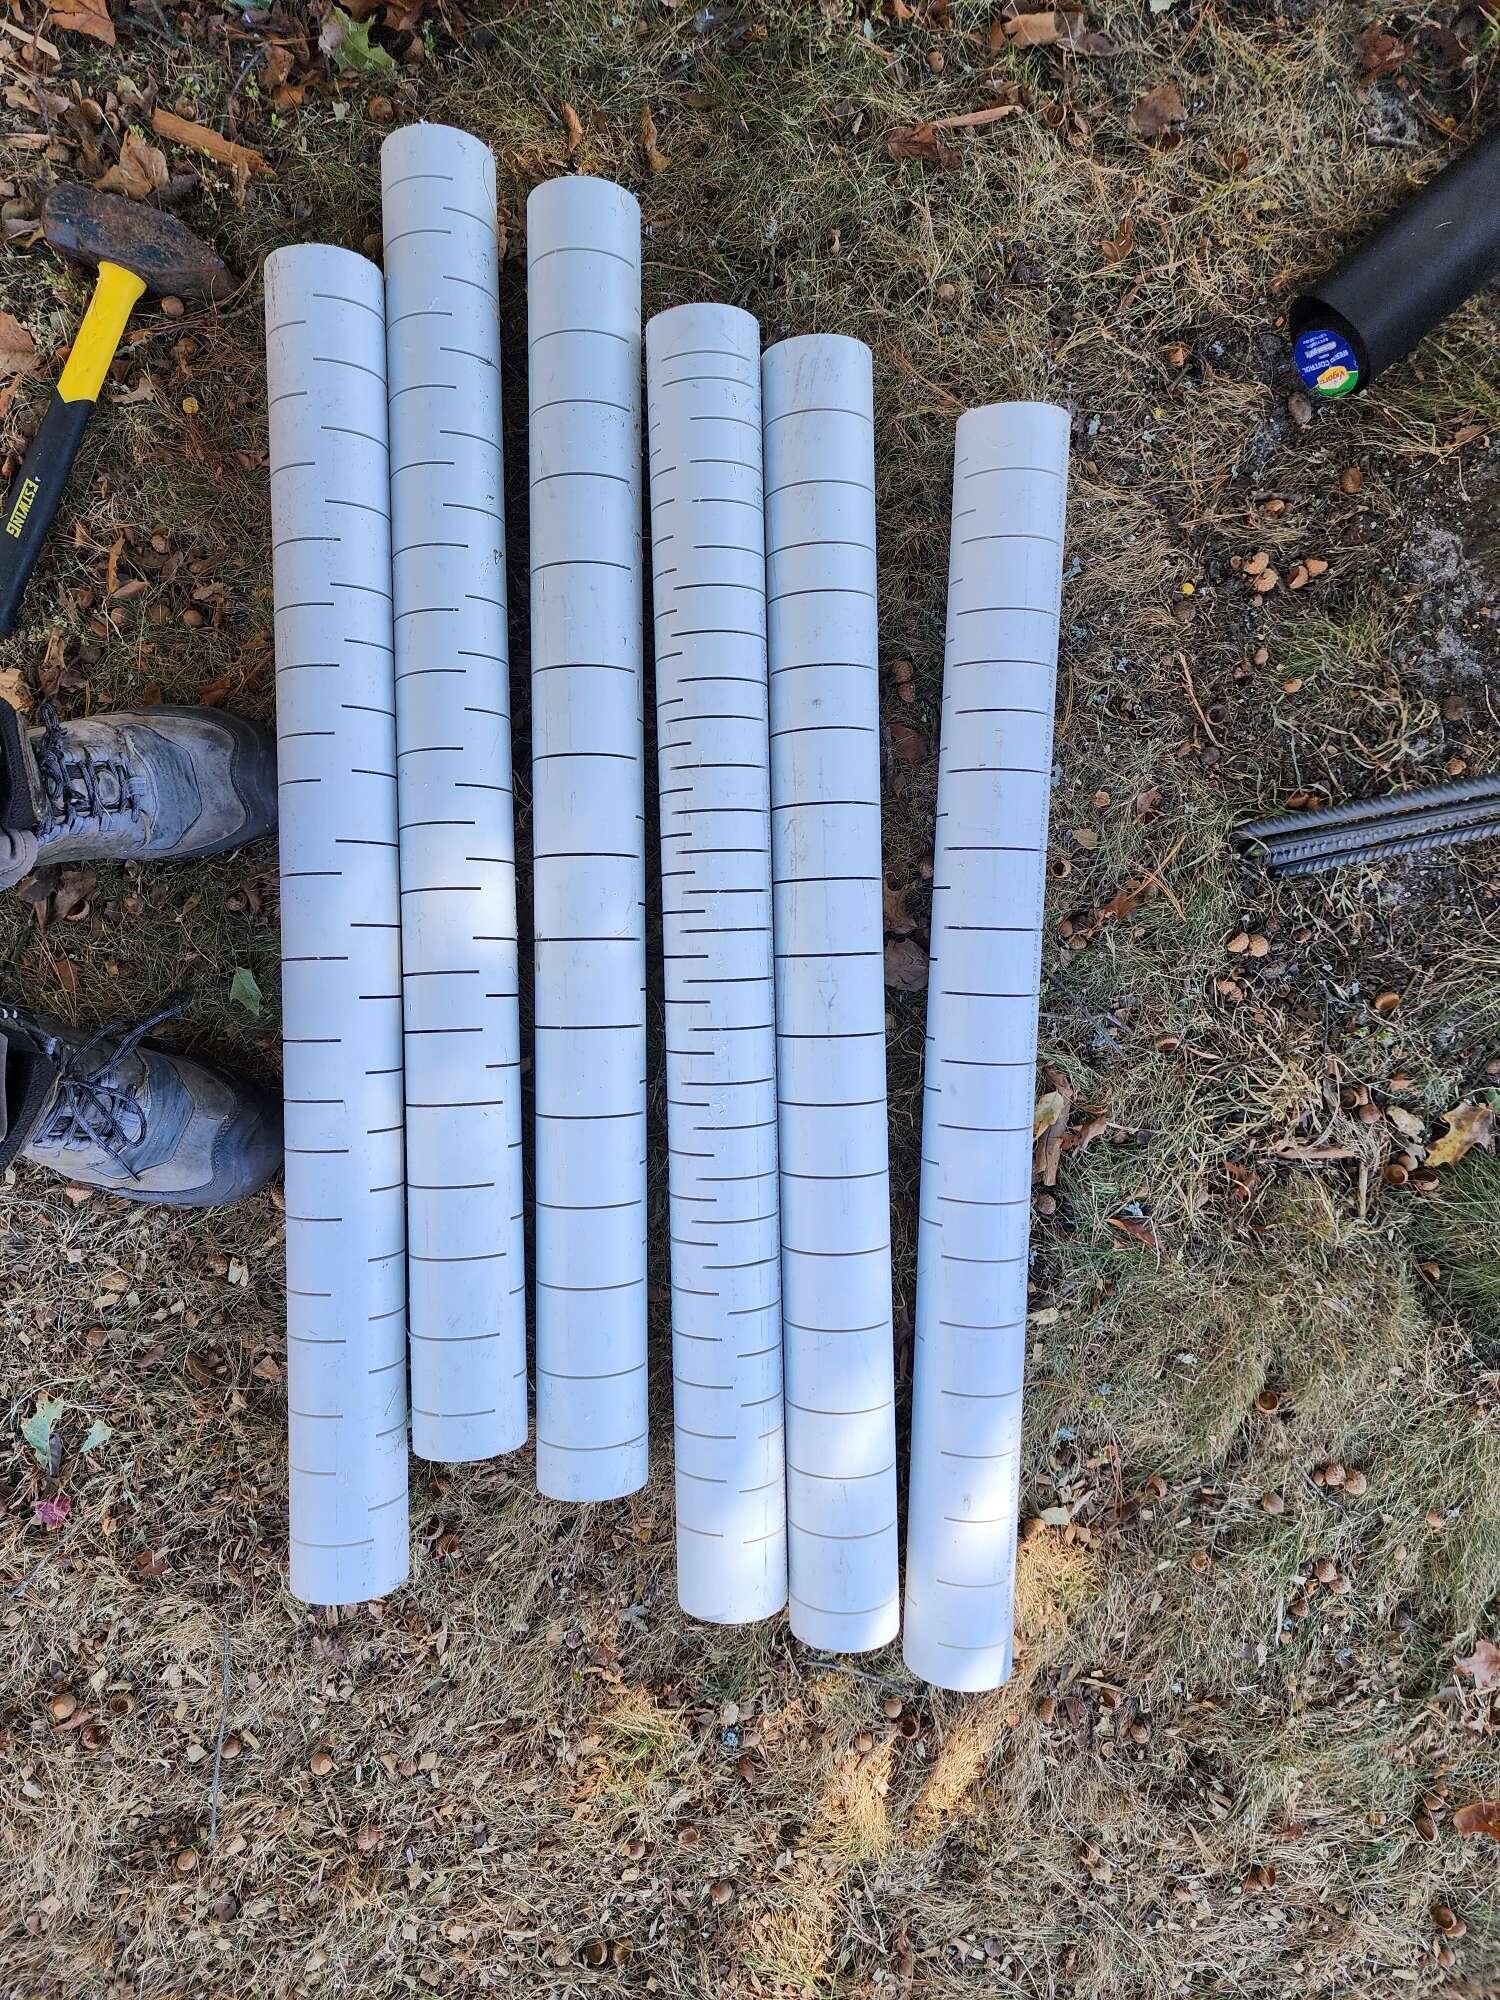
Then I took a 4in drain pipe and put dozens of holes in it for the center pipe, and 2- 3in x 10ft PVC pipes, cur them to 40" long, and, using a miter saw, cut lots of slits in it for air exchange.
The 4 inch pipe I placed in the middle of the cylinder. I then took 6x 5ft rebar lengths and hammered them a few inches into the ground, spaced evenly around the center pipe, trying to get within a foot of the wall and of the center pipe, and the other additional pipes. The goal is for nowhere within the cylinder to be more then 1 foot from air exchange. Once they were done, I slid the 3in pipes over the rebar.i put paper cups over the ends of the pipes so they wouldn't fill up as I was filling the cylinder.
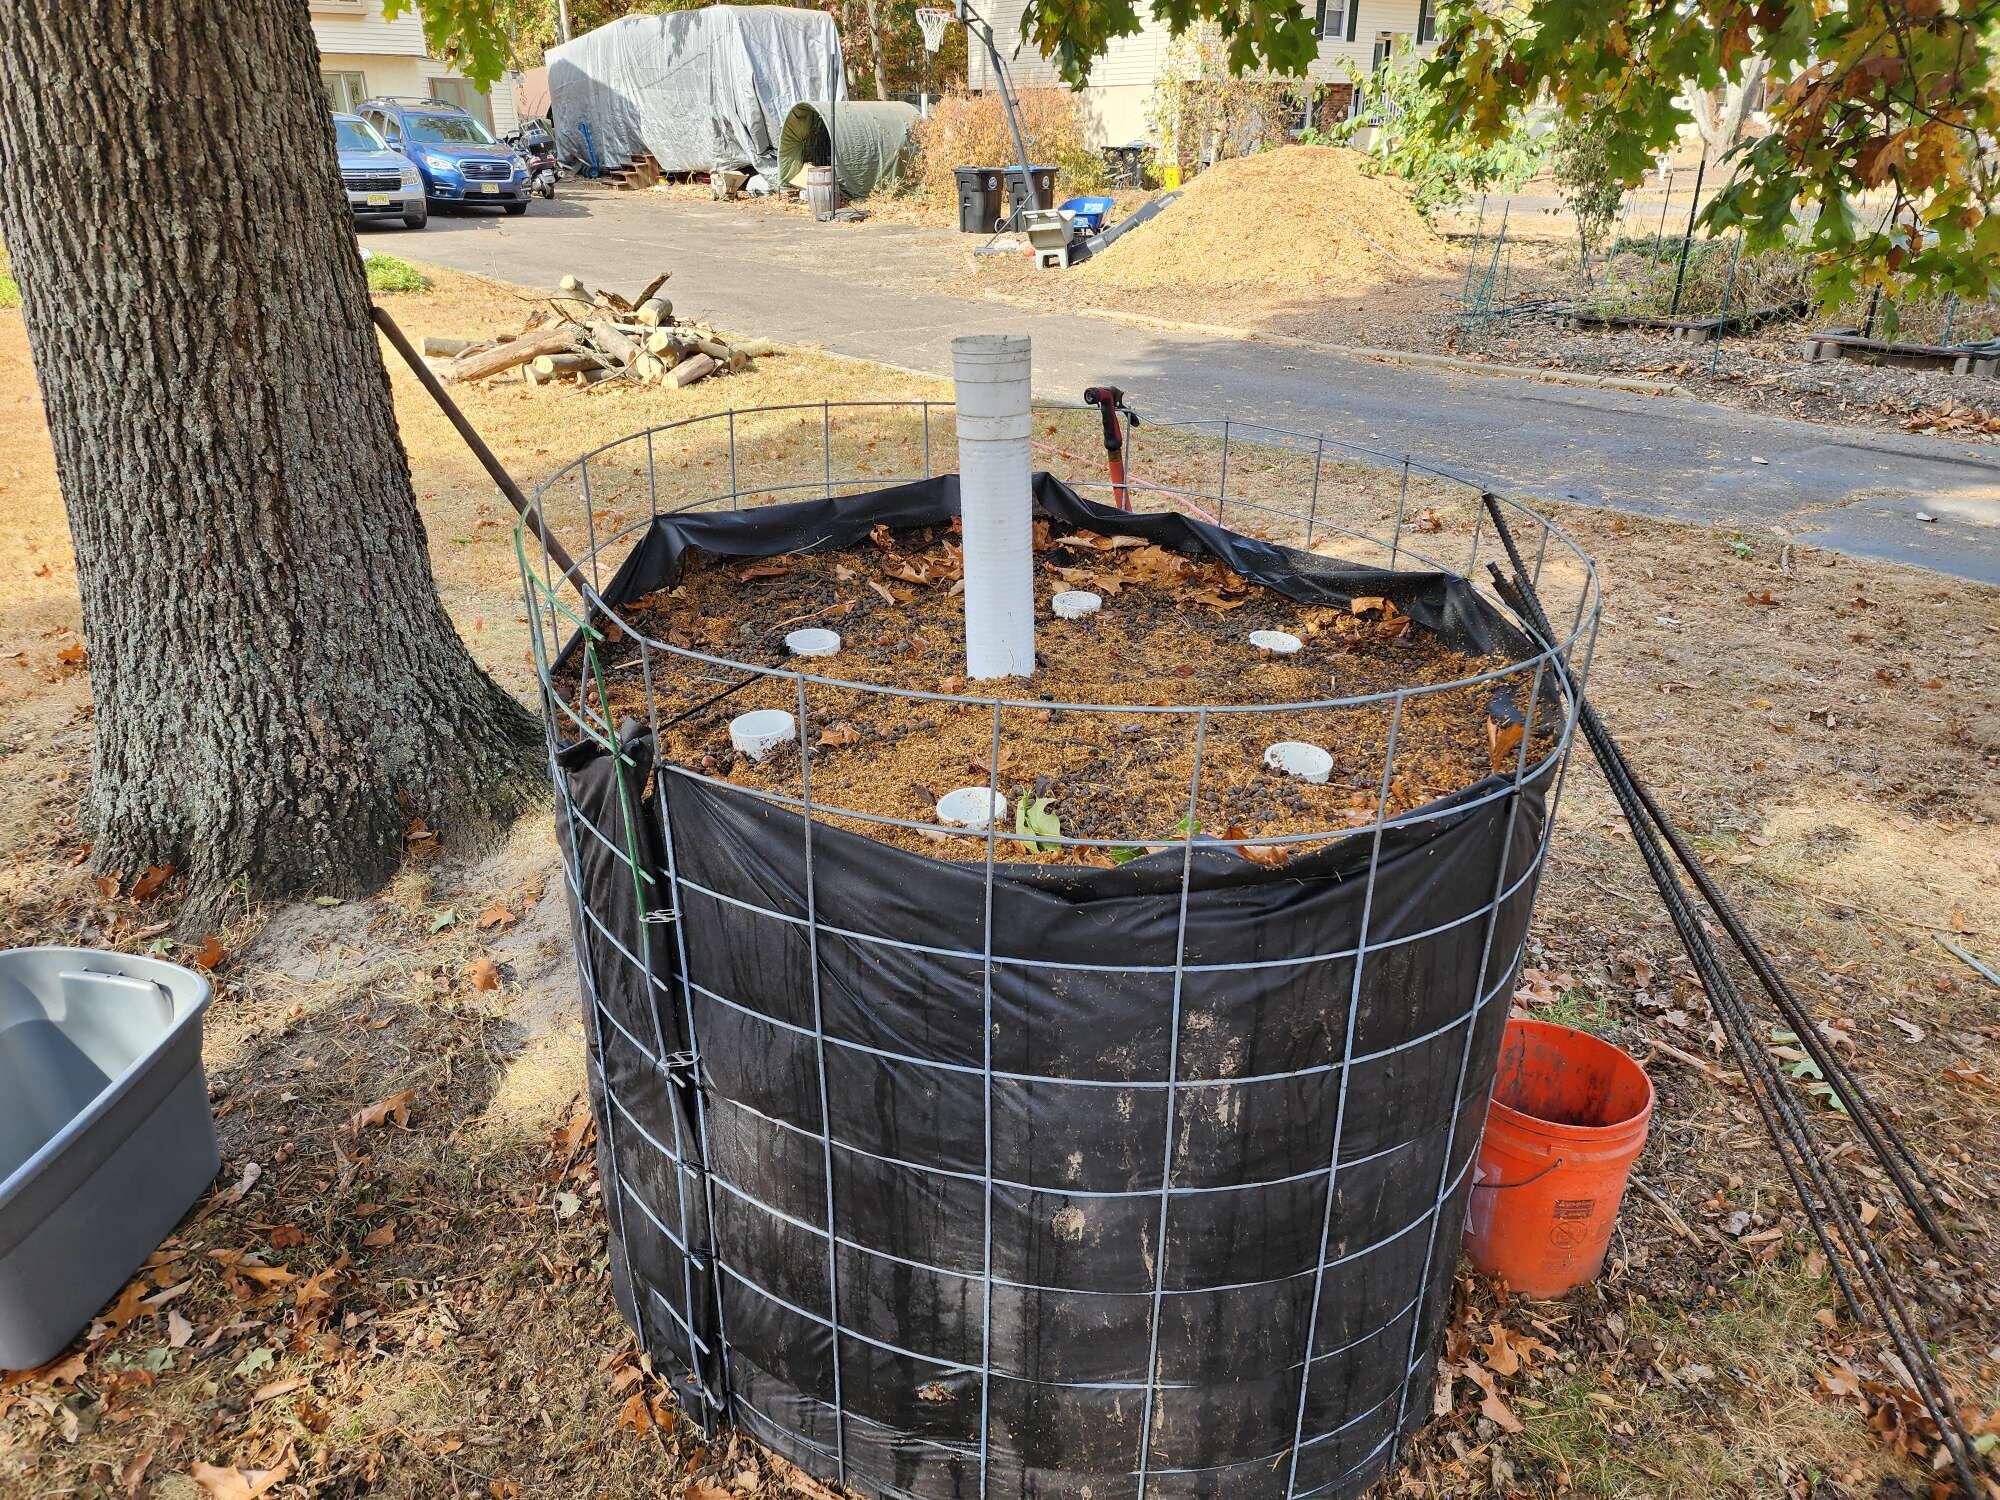
I then took the remainder of a pile of wool chips we got a few weeks ago, and soaked them in a couple of concrete mixing trays. Once the chips (and leaves) were saturated, I shoveled them into the cylinder. Once I had about 6 inches of chips, I started adding a shovel of rabbit manure (mixed with biochar) into each mixing tray. This helped even the spread over the entire mix.
Once that pile of wood chips was exhausted, I started harvesting from the old chicken run, around the edges of the new wood chips pile, repeating the same soak and then fill, each tray with a scoop of rabbit manure.
Periodicly I would hose down the whole thing until water seeped out from the bottom. You wouldn't believe how much water something like this takes up.
After this week, I will be adding 2 gallons of water daily until it's done. This is to keep the compost from drying out.
The real goal would be to leave this compost for 1 year. The reality is, I will be using this up in the spring to full new beds and top up old ones. I will be starting another one in the spring, which will go for a full year to get the maximum benefit.
This project took me about 8 hours of dedicated time to complete. The rebar, and airflow pipes will be removed and could be used to make a second pile while this one is still cooking, but I think I'm going to wait until the spring in order to have a new batch ready each spring as I'm getting ready to plant out my garden beds.
Things I would do differently at this point...
1) I would have purchased another 3in x 10' PVC pipe and cut them all to 5 feet. This would have allowed me to fill the cattle panels to the top.
2) I started with 3 of the stainless S-clips, but I should have used 6 (they come in a 3 pack from Home Depot). On about day 3 I noticed the middle one of the 3 had snapped in half and was no longer holding its shape. I then added 3 more and it seems more stable, but should have done that from the start.
3) I would have liked to have used the chips that the chickens had been using in their run for the last year, as this likely would have added a lot more biology to the mix.
I also got some stainless steel gutter guards in place on all my gutters in preparation for a rainwater harvesting project coming soon.


